
Guide to sharing documents in Zoom with
Office365
What is Office365 and why should I use it?
All VU staff and students have access to Office 365, an online cloud-based service from Microsoft which allows users
to collaborate for free with online versions of Microsoft Word, PowerPoint, Excel, and OneNote, as well as access
Outlook, SharePoint and other productivity apps. You can save documents, spreadsheets, and presentations online,
and choose to share files and folders with another person (or groups of people). So if you want to brainstorm, or
students to work in a group, each member of the team can make changes and add comments.
How-to guide
Step 1: Access Office 365
1. Go to https://www.office.com/ and click Sign in
2. Login using your staff id@vu.edu.au (e.g. e12345[email protected].au)
Step 2: Access and navigate OneDrive
1. Once logged in, navigate to OneDrive. Any documents, spreadsheets or presentations you create within
Office365 (Word, Excel and PowerPoint) will be stored here.

2. There are three sections of OneDrive you should be aware of:
• My files is your document storage, just like on your computer
• Shared is where you’ll find any files or folder other people have shared with you
• Shared libraries is a list of any SharePoint groups or sites you are a member of
Step 3: Create folders for your units
1. Click New, then select Folder
2. Give your folder a clear name i.e. UNIT CODE Unit Name (e.g.VUC1001 OneDrive Basics), then click Create
3. Repeat this process for all your units. TIP: Create folders for Groups, Sessions or Topics to organise your
content further.
My files is your
document storage,
just like on your
computer
Shared is where you’ll find
any files or folder other
people have shared with
you
Shared libraries is a
list of any SharePoint
groups or sites you
are a member of
Give your
folder a clear
name
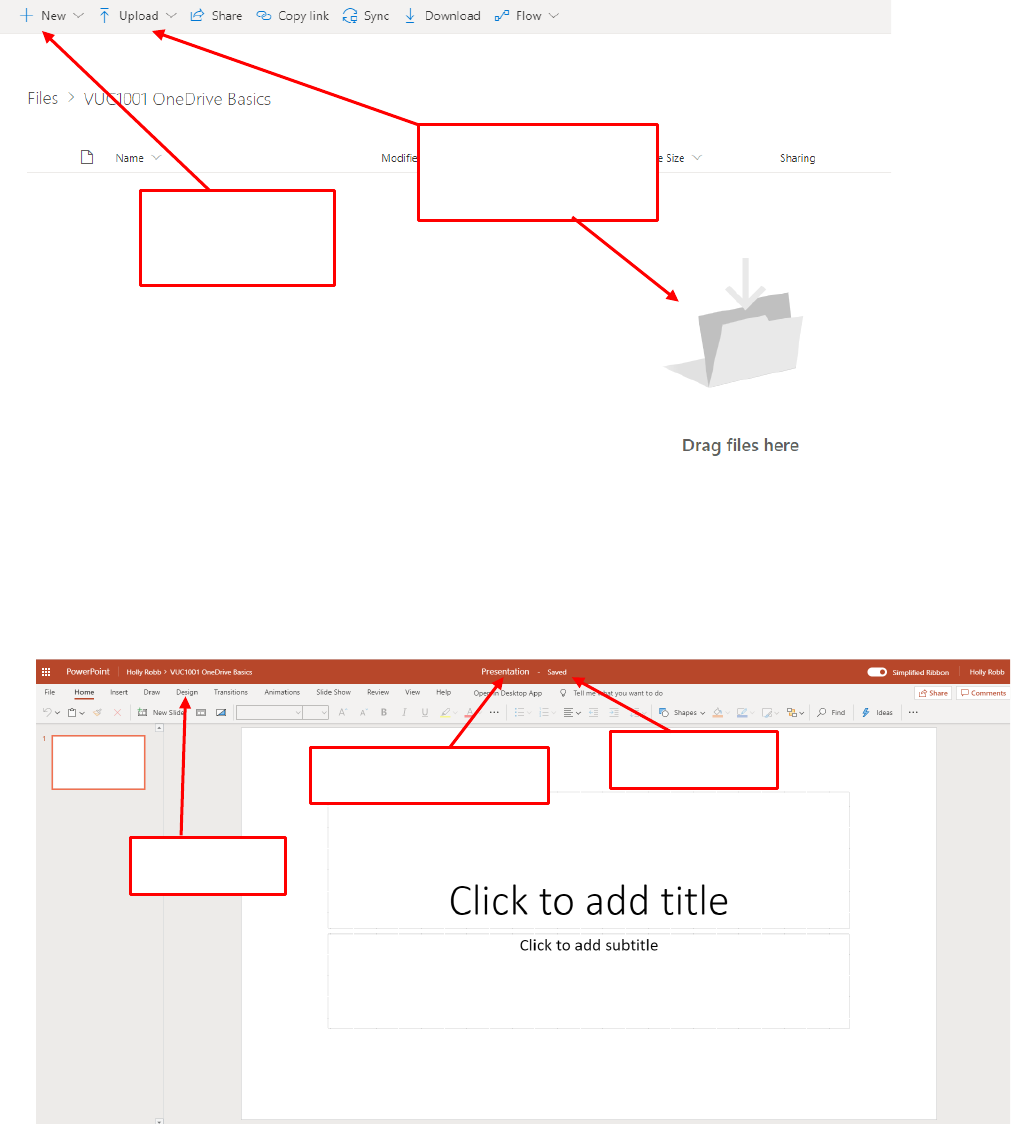
Step 4: Uploading or creating files in OneDrive
1. To add an existing file or folder to your OneDrive, select Upload>File/Folder
2. To create a new file in your OneDrive, select New and choose from Word, Excel or PowerPoint
Step 5: Making a collaborative document for a Zoom ‘in-class’ activity
1. Select New>PowerPoint Presentation
2. A new tab will open with the online version of PowerPoint
3. Name your presentation!
4. Choose a presentation template via the Design tab
You can Upload
or drag and drop existing files
from your computer into your
OneDrive folder
If you want to create a
new file, select New and
choose from Word,
Excel or PowerPoint
Click here to edit the name of
your presentation
Any changes will be
automatically saved
Access templates
via the Design tab

5. Design an activity you would usually get students to complete in groups.
6. Duplicate the slide (Right click on slide > Duplicate slide) for the amount of potential groups and label them
Group 1, Group 2, Group 3 etc.
Step 6: Create a shareable link to give your students
1. In the top right corner of the PowerPoint click Share
2. Click on Anyone with the link can view
3. Check the Allow editing box and click Apply
4. Click Copy Link and paste to Zoom Chat (or other platform) to share with students. Multiple people can
access and edit the file at the same time. All edits will be saved automatically.
5. Be sure to tell students which number group they are in so they know which slide to edit! This can be
organised via Zoom Breakout Rooms.
