
1
1065 South Rogers Circle • Boca Raton, FL 33487 • Phone (561) 998-9600 • Fax (561) 998-9609
July 22, 2024
Testing a Printer Using the Configure Program
Boca Systems, Inc. has developed a Windows based program that allows customers to communicate from a host computer to
the printer over any interface (parallel, serial, USB, Ethernet) and print drivers too. The below program link is found on our
website under the “SUPPORT “section.
The following will guide you through downloading the BOCA configure and test program to
the host computer.
1. Click on the below link to download the below file to your computer Download folder.
a. If you have a 64-bit system, click on the below link
www.bocasystems.com/documents/configure_boca.zip
b. If you have a 32-bit system, click on the below link
www.bocasystems.com/documents/configure_boca32.zip
2. Click on the File Explorer icon on your taskbar.
3. You will want to go to the Downloads folder. There are many ways to get to said folder, the following is one
example. Double click on the Downloads folder under Frequent folder, your quick access may look different.
4. When the Downloads pop up box comes up, right click on configure_boca.zip to highlight it. Click on Extract All..
in the dropdown menu.
Double click on
Downloads Icon
Click on the
File Explorer
icon
Right click on
configure_boca.zip
Click on
Extract All…

2
5. When the below pop up comes up click on Extract button.
6. When the below pop up comes up double click on configure_boca folder to open it.
\
7. When the below comes up, double click on configurebocainstaller.msi. up right click on setup.exe and click on Run
as administrator in the dropdown menu.
8. If the below pops up may show up, click on More info and then click on Run anyway.
Click on
Extract button
Double click on
Configure_boca
Double click on
Configurebocainstaller.msi
Click on
More Info

3
9. Click on Run anyway.
10. The below icon may show up on your taskbar. If it does, click on it.
11. When the user account control popup comes up, click on the Yes button.
12. When the below Configure Boca – InstallShield Wizard popup comes up click on the Next button.
13. On the next popup click on the Next button.
Click on
Next button
Click on
Next button
Click on
Yes button
Click on
Run anyway

4
14. On the next popup click on the Next button.
15. While the programing is installing the below popup will be shown. No action is needed.
16. When the below pop up is shown click on the Finish button. The test program has now been installed on your
computer.
17. Once the program has installed, there will be a Configure 8.9.1.9 shortcut icon on your desktop.
Click on
Finish button
Click on
Next button

5
The following steps will guide you through using this program once it has been installed on
your host computer.
1. Hook the BOCA printer to the host computer that you have the Configure program installed on. Make sure that the printer
has stock loaded and is ready to go. A printer is ready to print when it is able to print out a self-test ticket by depressing the
TEST button. If you are not able to get a self-test ticket, refer to the user’s manual to make sure you have the printer
properly setup.
2. On your Window’s desktop double click on Configure 8.9.1.9 icon.
3. There is a possibility the below User Account Control popup may be shown, click on the Yes button.
4. Once the program is open, click on the “Select A Printer” drop-down arrow.
5. You will have two choices.
Print Driver - if you’re connecting via a print driver. Go to step #8 prior to selecting this option.
Printer Interface - Parallel, Serial, Ethernet or USB-HID mode (go to next step)
6. PRINTER INTERFACE: You will need to choose the interface connection that you have the BOCA printer hooked up to then
click the OK button. Please note that USB-HID mode is only for a printer that is configured for USB HID mode.
If you are connecting via the Ethernet port or Wi-Fi then in the IP Address box type in the printer’s current IP address. The
printer’s current IP address is printed on the self-test ticket (when the test button is pressed). When typing in the address
don’t include the leading zeros (If IP=189.010.000.002 then type in 189.10.0.2). Click on the Connect button.
Click on
Yes button
Click on
Select a Printer dropdown
arrow

6
7. Once connected the Printer State will show Printer Ready. Go to step #14.
8. In the Select a Printer area select Printer Driver.
9. When the Printer driver selection popup comes up click on drop down arrow and then select the print driver that is
associated to the printer you are using. Caution: Your computer’s default printer will be highlighted in the list and may
not necessarily be the driver for the BOCA printer. Normally the driver associated with the printer would start with the
word Boca.
10. Once the Driver has been selected click on the OK button.
Your selection of drivers will vary from what is shown in above image
Click on
Dropdown arrow
Click on
The driver associated with the
printer, for this example you
would click on Boca BIDI…..
Click on
OK button
Click on
Printer Driver

7
11. Once connected the Printer State will show Printer Ready
12. The Connection Type Boca Driver – Direct Standard Bidi will be shown.
13. Select the test the matches the protocol of your printer. If your printer has FGL protocol (self-test will show FGL…)
then click on the yellow “FGL Test Ticket” button or if your printer has PCL protocol (self-test will show HP…) then
click on the yellow “PCL Test Ticket” button.
14. Once the Test Ticket selection box comes up, click on the Send button to print out a ticket. You will see one of the
two below depending which test you selected in step 11.
15. You may also print more than one ticket by changing the number of tickets you want to print.
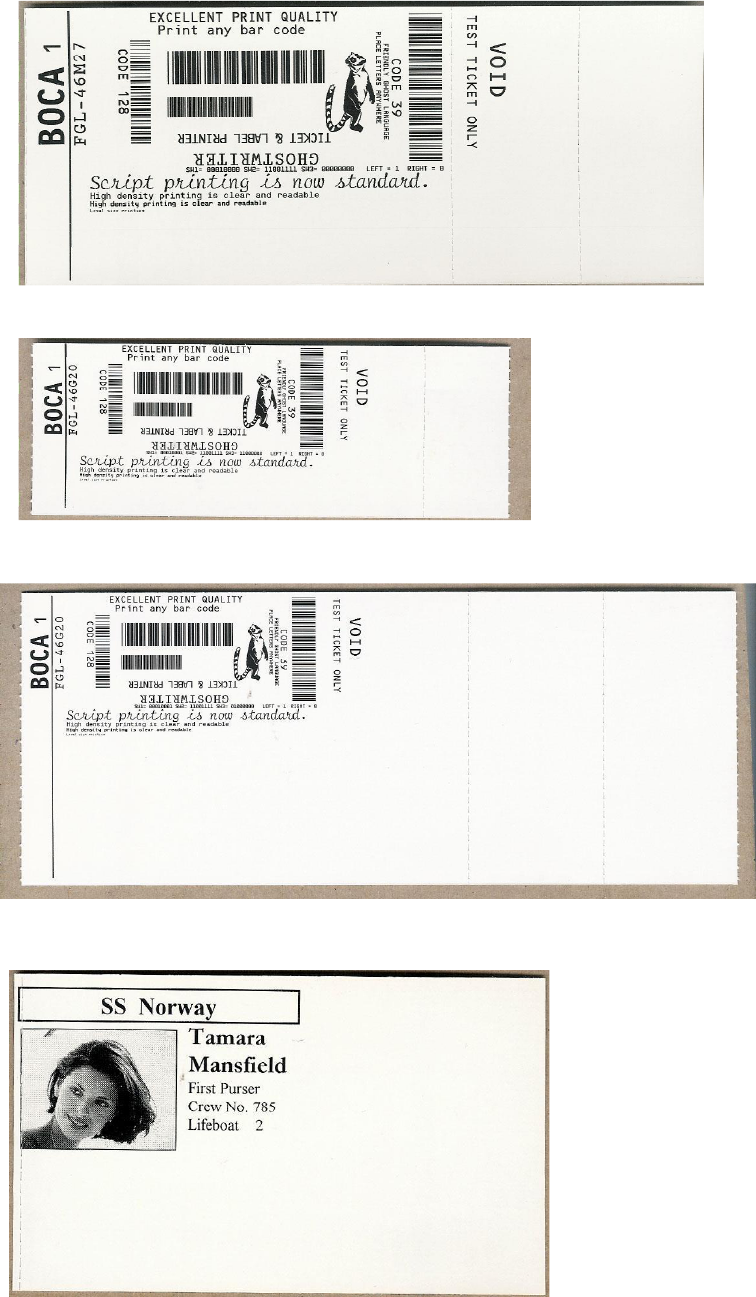
Below are sample printouts. Your sample printout may vary due to ticket width and length.
Can change the
number of tickets
to print
Click on
Send to print
tickets
If your self-test looks like this then select
PCL Test Ticket
If your self-test looks like this then select
FGL Test Ticket
8
Above sample FGL ticket was printed on a 2” x 5.5” (concert) ticket using a RADJW-2 200dpi printer
Above sample FGL ticket was printed on a 3.25” x 8” (receipt) ticket using a RADJW-3.25 200dpi FGL printer
Above sample FGL ticket was printed on a 2” x 5.5” (concert) ticket using a RADJW-2 300dpi FGL printer
Above sample FGL ticket was printed on a 3.25” x 8” (receipt) ticket using a RADJW-3.25 300dpi FGL printer
Above sample PCL ticket was printed on a 3.25” x 5” ticket using a RADJW-3.25 300dpi PCL printer
Click on the HELP button at any time to open up the help window.
